
The basic version of Leonardo AI is available for free, although it comes with a daily limit of 150 tokens. For those who need more capabilities and fewer restrictions, premium plans start at $10 per month. However, the free version is sufficient for most beginners. It is recommended to try the free version before opting for the paid one. Here is your guide to creating images with Leonardo AI.
Here are 5 steps to get started with Leonardo AI:
Start:
Go to the Leonardo AI App:
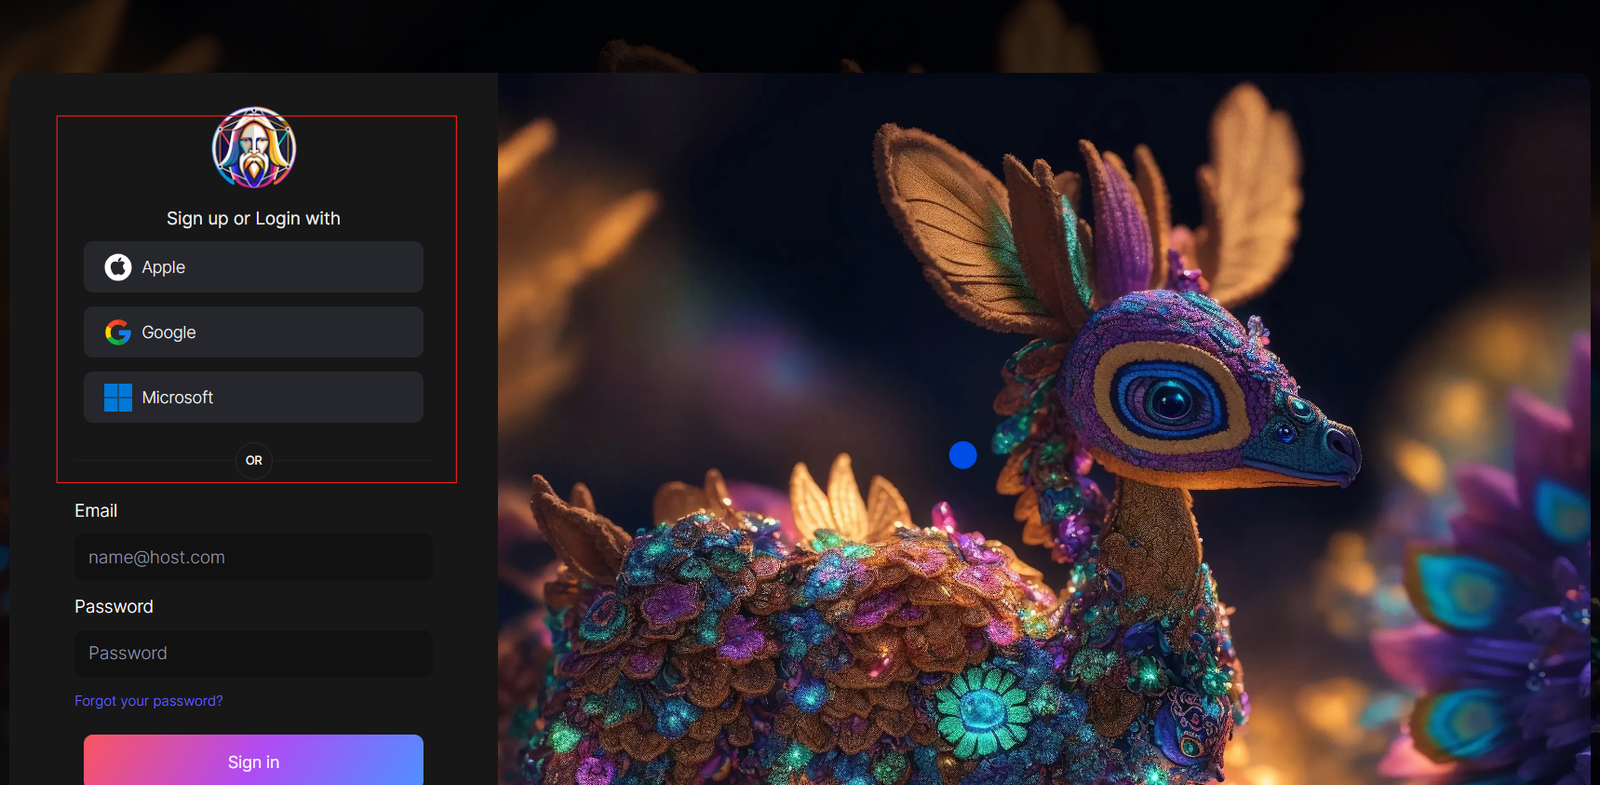
You can sign in with your Apple, Google, Microsoft account, or email account. Then, sign in with your newly created account.
Navigate to the image creation tool
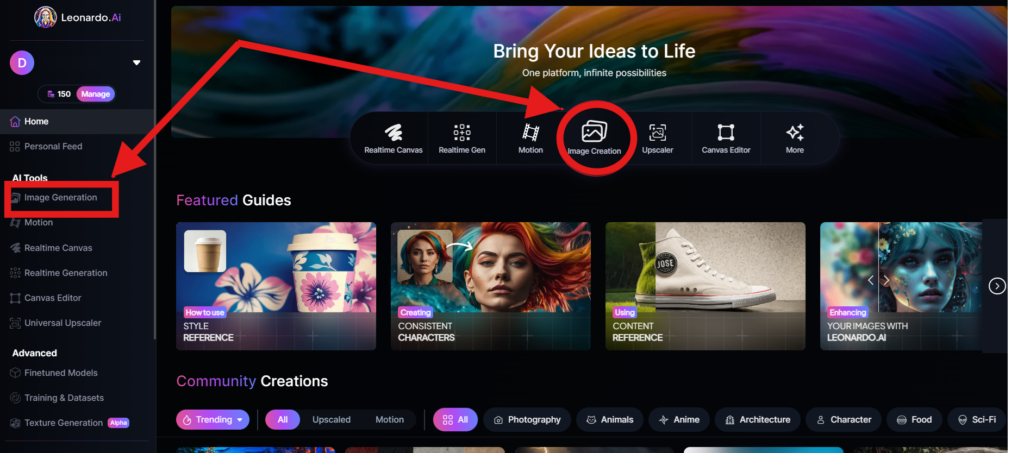
On the app.leonardo.ai homepage, select the ‘Image Generation’ option from the left panel, click on the icon in the middle or use the ‘Image Creation’ button located in the middle
Create your first image
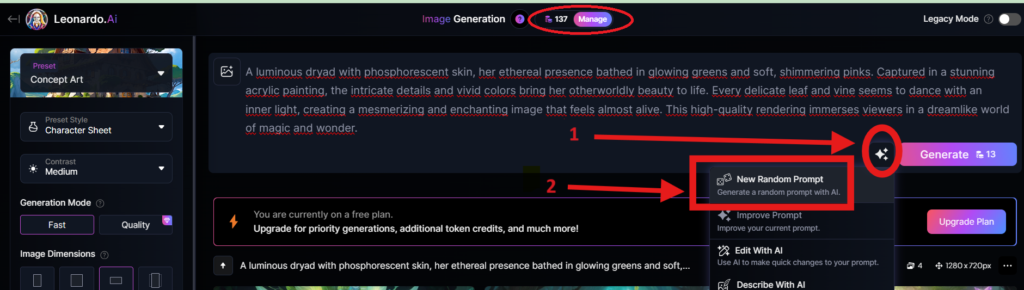
In the prompt field at the top you can immediately create your desired Image. Or you can also create a reminder with the available AI suggestions in 2 ways:
+ Generate a random photo: 1, Click to “New Random Prompt” then 2. click Generate
+ Create a photo with an AI description by an image that you want to get the original idea. Then you edit according to your creativity
Wait about 20 seconds for Leonardo AI to generate the images, and you will receive four stunning high-resolution images as follows:
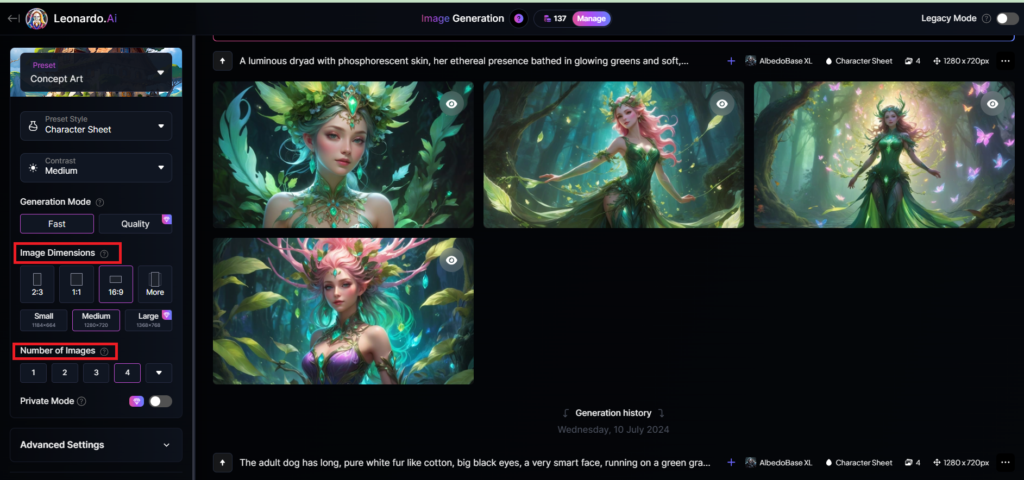
You can select the image size in the “Image Dimensions” section, which includes sizes like 2:3, 1:1, 16:9, and more options under “More” on the left. Alternatively, you can choose the number of images in the “Number of Images” section, with a maximum of 8 images that can be generated.
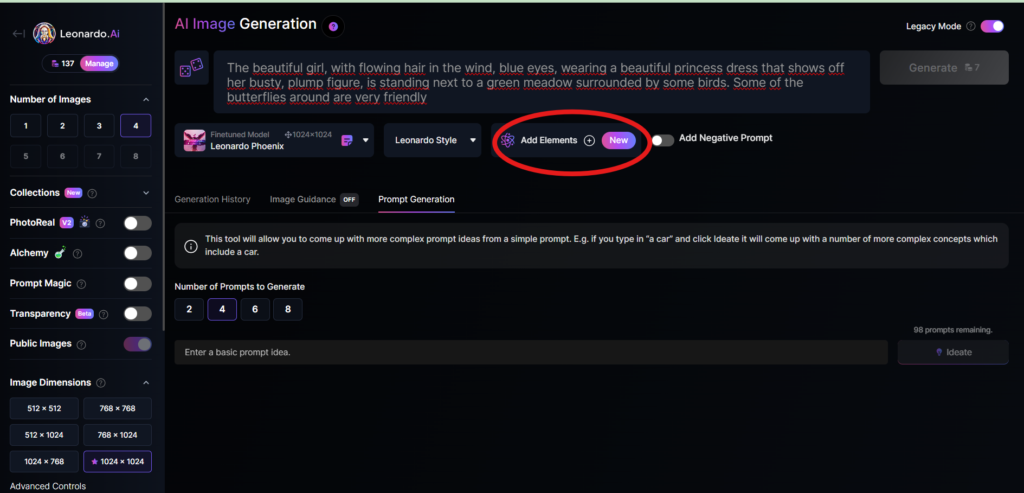
Add Elements
Use the drop-down menu under “Add Elements” to select a specific element such as Coloring Book, Folk Art Illustration, Children’s Illustration, Cartoon & Anime, or Classic Style Christmas Illustration. Although you can select multiple elements, Leonardo advises that choosing more than two elements may lead to unpredictable results.
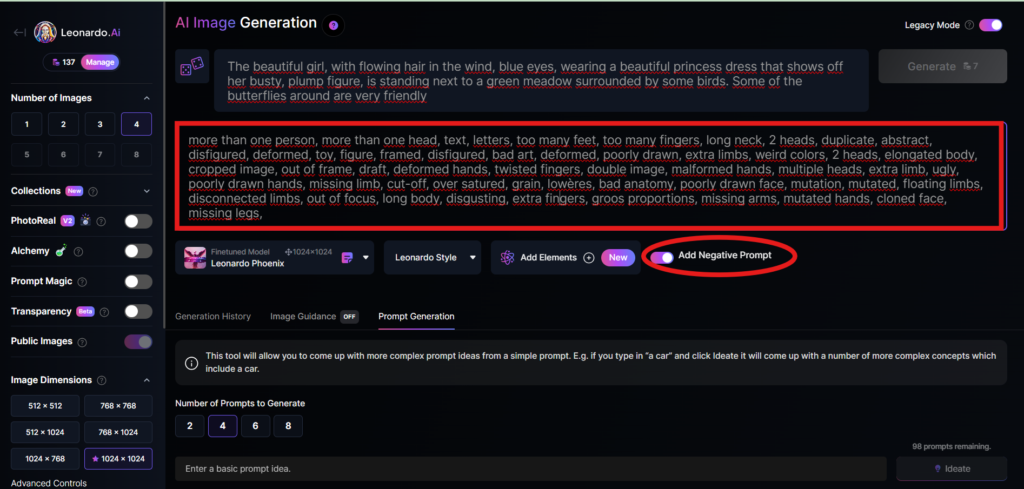
Add a negative prompt
As in the example above, I created negative prompts to ensure the resulting images were error-free, including: “more than one person, more than one head, text, letters, too many feet, too many fingers, long neck, 2 heads, duplicate, abstract, disfigured, deformed, toy, figure, framed, disfigured, bad art, deformed, poorly drawn, extra limbs, weird colors, 2 heads, elongated body, cropped image, out of frame, draft, deformed hands, twisted fingers, double image, malformed hands, multiple heads, extra limb, ugly, poorly drawn hands, missing limb, cut-off, over satured, grain, lowères, bad anatomy, poorly drawn face, mutation, mutated, floating limbs, disconnected limbs, out of focus, long body, disgusting, extra fingers, groos proportions, missing arms, mutated hands, cloned face, missing legs,”
Here are the basic steps for new users to create a simple image with Leonardo AI. In the next article, I will guide you through advanced details to create various types of images for different purposes. You can start your free trial with Leonardo AI here:

fantastic points altogether, you simply gained a new reader.
What may you suggest about your post that you simply made some
days ago? Any certain?
kamagpharm
I am regular reader, how are you everybody? This piece of writing posted at this website is in fact good.
https://www.instructorsnearme.com/author/anthropologygeg9252/
Thanks for another informative web site. The place else could I get that kind of info written in such
an ideal manner? I’ve a project that I am simply now working on, and I
have been on the look out for such info.
https://fabble.cc/biggestouj82
https://hedgedoc.dawan.fr/s/nsgZOTupT
Купить лирику в москве – Купить Мефедрон, Альфа-ПВП, Бошки, Марихуану
I could not resist commenting. Well written!
Really interesting content. I discovered it while searching around for คลิปหลุด เสียงไทย.
https://pad.cgtinformatica.org/s/B1YN3NgOzg
buy Kamagra Oral Jelly no prescription https://kamagpharm.shop/# kamagpharm
https://md.freiheitswolke.org/s/SoNGlriAHd
Криптовалютные накопления уязвимы без грамотной защиты, и любая ошибка делает капитал легкой целью для слежки. На https://criptoi.com/ собраны честные обзоры криптокарт без KYC, холодных и горячих кошельков, а также схемы обфускации транзакций с пошаговыми инструкциями. Не стоит ставить приватность на паузу — надежные решения помогут удержать финансы под полным контролем.
Трамадол купить в москве – Купить Мефедрон, Альфа-ПВП, Бошки, Марихуану
Изучайте полезные материалы о займах: https://rutube.ru/channel/79921252/ – на официальном RUTUBE-канале BANK-NEVA понятно объясняются условия микрокредитования, причины отказов, правила успешного оформления заявки и требования к заемщикам! Эксперты канала объясняют, как получить займ без отказа в 90% случаев, правильно заполнить анкету и не допустить неточностей, из-за которых скоринговая система может принять отрицательное решение. Вы узнаете, что такое полная стоимость кредита, почему ПСК важнее рекламной ставки и сколько в итоге придется вернуть микрофинансовой организации.
Отдельные видео посвящены новые и малоизвестные МФО. Мы объясняем, почему у таких компаний процент одобренных заявок нередко выше, чем у известных организаций. Новые МФО еще набирают постоянных клиентов, поэтому нередко используют гибкую систему скоринга. При этом решение зависит от данных конкретного заемщика, и ни одна организация не может гарантировать одобрение абсолютно всем.
Также вы узнаете, как быстро оформить займ через Госуслуги, зачем нужна подтвержденная учетная запись и каким образом передача проверенных данных ускоряет заполнение онлайн заявки. Мы разбираем займы без процентов, платные подписки, способы погашения задолженности, влияние просрочек на кредитную историю и действия после отказа.
BANK-NEVA заслуживает доверия, потому что это независимый информационный сервис, а не кредитор. Сервис не занимается выдачей денег и не влияет на одобрение. Наша задача – помочь сравнить официальные МФО по ставке, сумме, сроку и требованиям, а затем выбрать подходящее предложение и подать заявку кредитору.
https://rentry.co/e2b8xg9h
Вейп с тгк – Купить Мефедрон, Альфа-ПВП, Бошки, Марихуану
Thanks for sharing this post. It’s always interesting to discover different คลิปหลุด เสียงไทย online.
If some one needs expert view concerning blogging after that i propose him/her to visit this blog,
Keep up the good job.
My page; audi car service cost