

The basic version of Leonardo AI is available for free, although it comes with a daily limit of 150 tokens. For those who need more capabilities and fewer restrictions, premium plans start at $10 per month. However, the free version is sufficient for most beginners. It is recommended to try the free version before opting for the paid one. Here is your guide to creating images with Leonardo AI.
Here are 5 steps to get started with Leonardo AI:
Start:
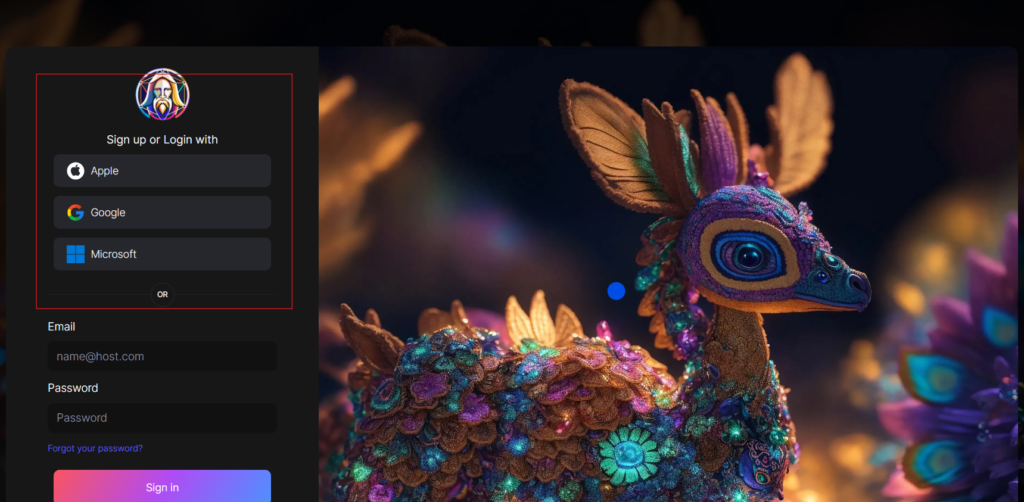
Go to the Leonardo AI App:
You can sign in with your Apple, Google, Microsoft account, or email account. Then, sign in with your newly created account.
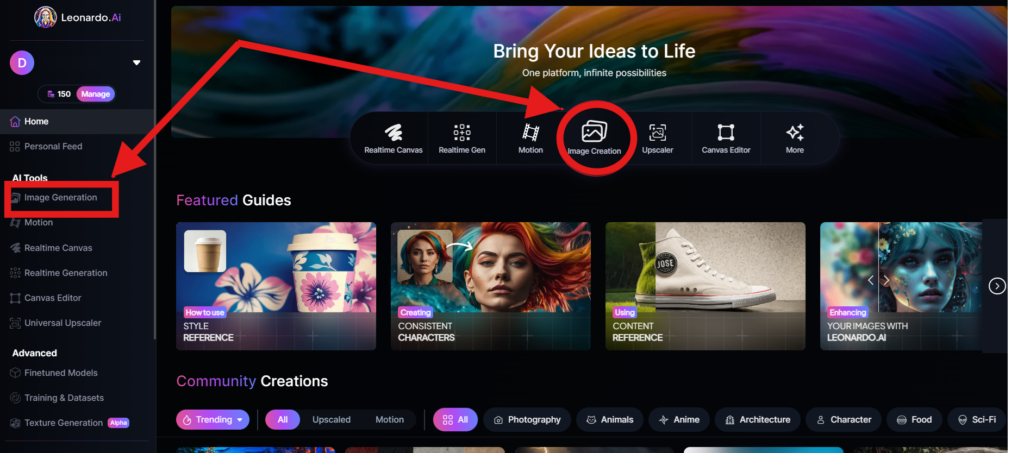
Navigate to the image creation tool
On the app.leonardo.ai homepage, select the ‘Image Generation’ option from the left panel, click on the icon in the middle or use the ‘Image Creation’ button located in the middle
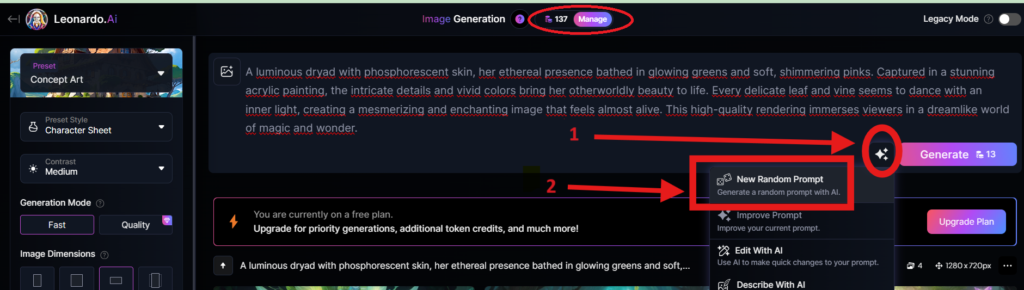
Create your first image
In the prompt field at the top you can immediately create your desired Image. Or you can also create a reminder with the available AI suggestions in 2 ways:
+ Generate a random photo: 1, Click to “New Random Prompt” then 2. click Generate
+ Create a photo with an AI description by an image that you want to get the original idea. Then you edit according to your creativity
Wait about 20 seconds for Leonardo AI to generate the images, and you will receive four stunning high-resolution images as follows:
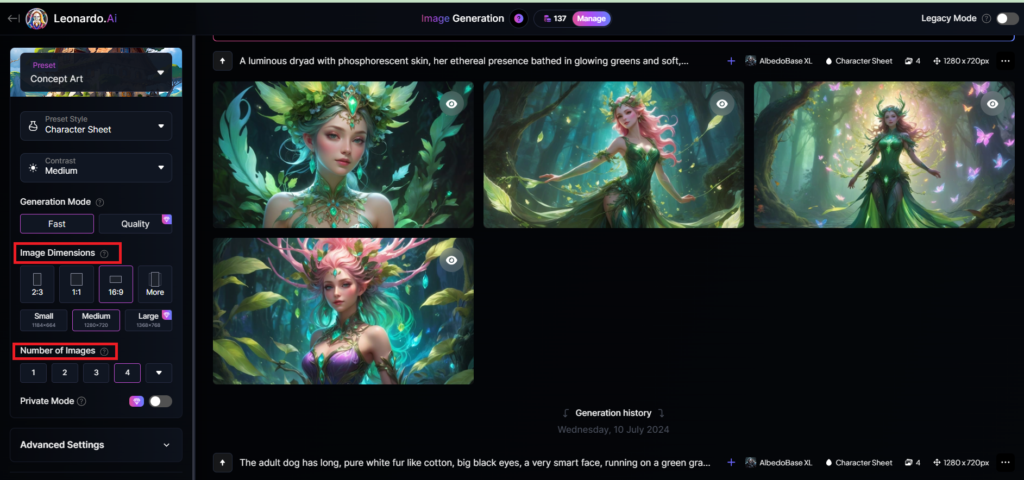
You can select the image size in the “Image Dimensions” section, which includes sizes like 2:3, 1:1, 16:9, and more options under “More” on the left. Alternatively, you can choose the number of images in the “Number of Images” section, with a maximum of 8 images that can be generated.
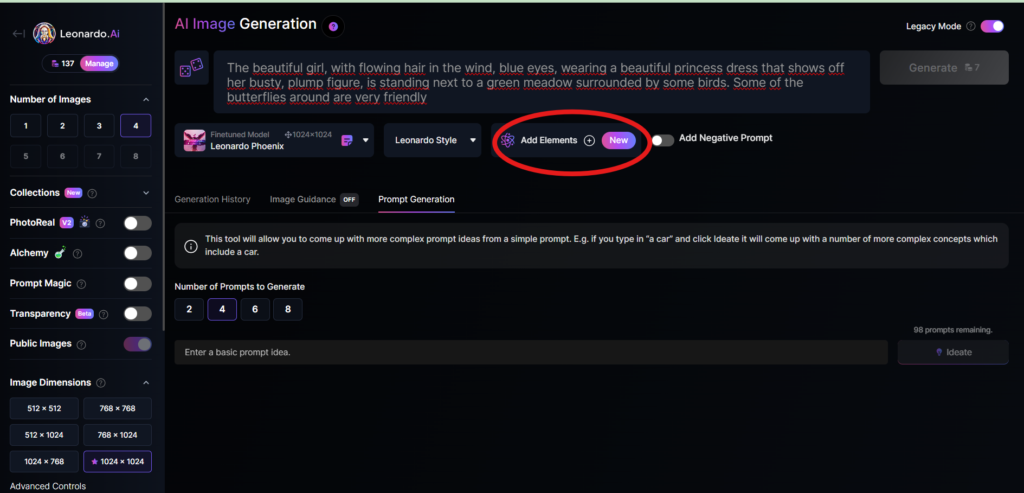
Add Elements
Use the drop-down menu under “Add Elements” to select a specific element such as Coloring Book, Folk Art Illustration, Children’s Illustration, Cartoon & Anime, or Classic Style Christmas Illustration. Although you can select multiple elements, Leonardo advises that choosing more than two elements may lead to unpredictable results.
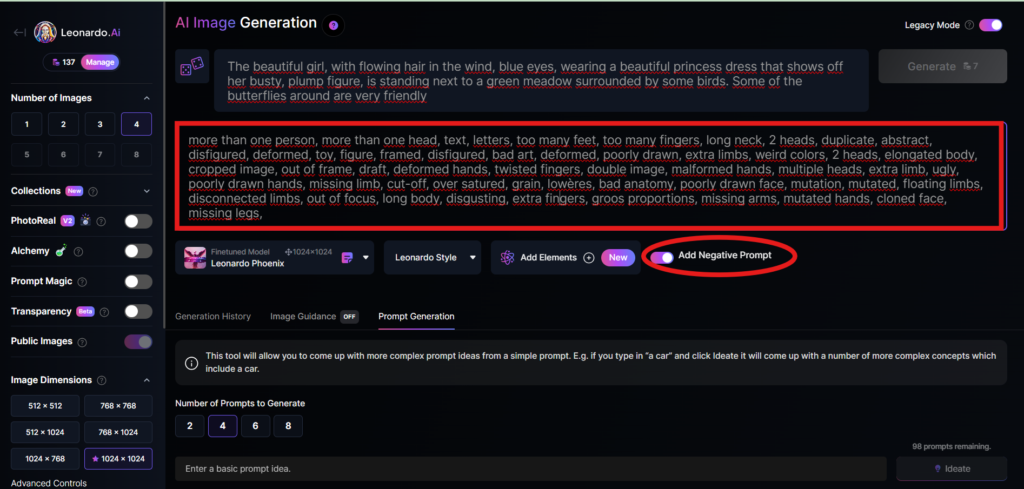
Add a negative prompt
As in the example above, I created negative prompts to ensure the resulting images were error-free, including: “more than one person, more than one head, text, letters, too many feet, too many fingers, long neck, 2 heads, duplicate, abstract, disfigured, deformed, toy, figure, framed, disfigured, bad art, deformed, poorly drawn, extra limbs, weird colors, 2 heads, elongated body, cropped image, out of frame, draft, deformed hands, twisted fingers, double image, malformed hands, multiple heads, extra limb, ugly, poorly drawn hands, missing limb, cut-off, over satured, grain, lowères, bad anatomy, poorly drawn face, mutation, mutated, floating limbs, disconnected limbs, out of focus, long body, disgusting, extra fingers, groos proportions, missing arms, mutated hands, cloned face, missing legs,”
Here are the basic steps for new users to create a simple image with Leonardo AI. In the next article, I will guide you through advanced details to create various types of images for different purposes. You can start your free trial with Leonardo AI here:


2 bedroom apartments for rent in dubai sports city Why Investing in Dubai Real Estate major developers in uae economic department of dubai
https://slotonlinejackpot.nl/code-promo-1xbet-inscription-1xcode777-130-e/
cost cheap altace pill
Visit the entrepreneurs’ blog https://heavyeyes.net/ , where you’ll find valuable advice, business plans, lessons, and business ideas for both beginners and experienced entrepreneurs. Learn all about business technologies, innovation, and creativity. This blog will help you stay on top of global trends and always be ahead of the curve.
tower rush betting game
You actually make it seem so easy with your presentation but
I find this topic to be actually something that I think I would never understand.
It seems too complex and very broad for me. I’m looking forward for your next
post, I’ll try to get the hang of it!
how can i get flexeril prices
rent in tecom dubai Houses for Sale in Dubai buy property in dubai and get residency dubai land price
gulab khan real estate dubai Buy houses dubai studio flat for rent in al nahda 1 dubai dubai real estate newsletter
marina square building 11 2 BHK Flat for Sale in Dubai zaffar real estate dubai house boat to rent in dubai
buy flexeril without prescription
how can i get cheap altace tablets
where to buy generic zebeta online
where to get altace without dr prescription
service charges dubai properties 3 Bedroom Apartments For Rent In Dubai list of property developers in dubai villa with swimming pool for rent for pary in dubai
Apartment for Rent in 23 Marina, Dubai palm jumeirah apartments for sale delta real estate dubai 3 bedroom apartments for rent in arjan dubai nov
부담 없이 시작할 수 있는 일을 찾다가 관악구 노래방알바에 지원하고 나서 안정감을 느꼈어요 이 일을 시작하길 정말 잘한 것 같아요
what is hotel apartment in dubai Why to Invest in Dubai Real Estate? Aura Gardens guide dubai creek tower deira apartments for rent
where can i buy cheap altace for sale
apartment for sale in discovery garden dubai Villas For Sale In Downtown Dubai bed space in abu dhabi best business to start in dubai with low investment