
The basic version of Leonardo AI is available for free, although it comes with a daily limit of 150 tokens. For those who need more capabilities and fewer restrictions, premium plans start at $10 per month. However, the free version is sufficient for most beginners. It is recommended to try the free version before opting for the paid one. Here is your guide to creating images with Leonardo AI.
Here are 5 steps to get started with Leonardo AI:
Start:
Go to the Leonardo AI App:
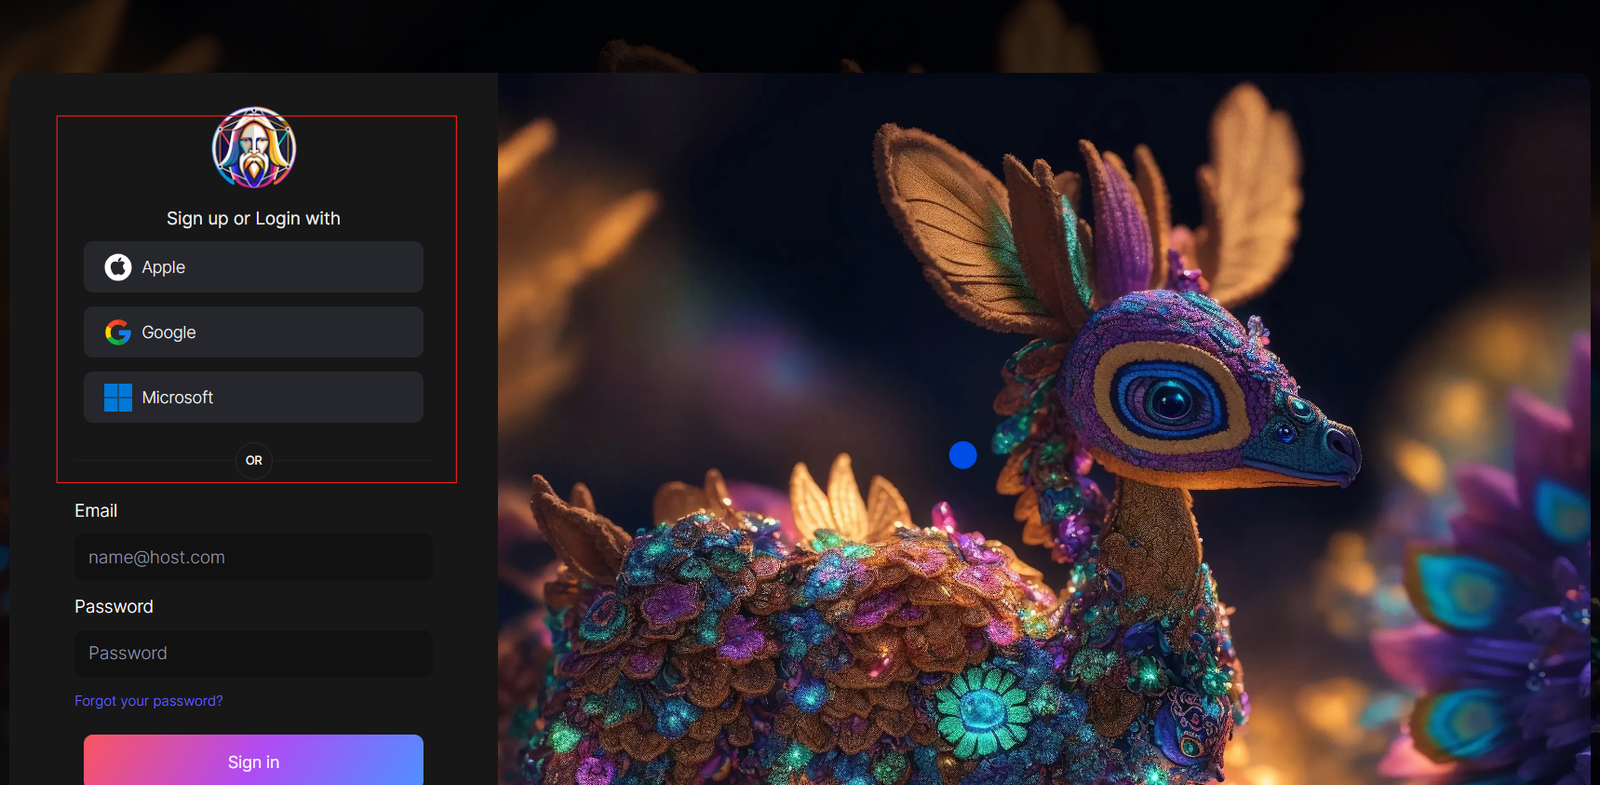
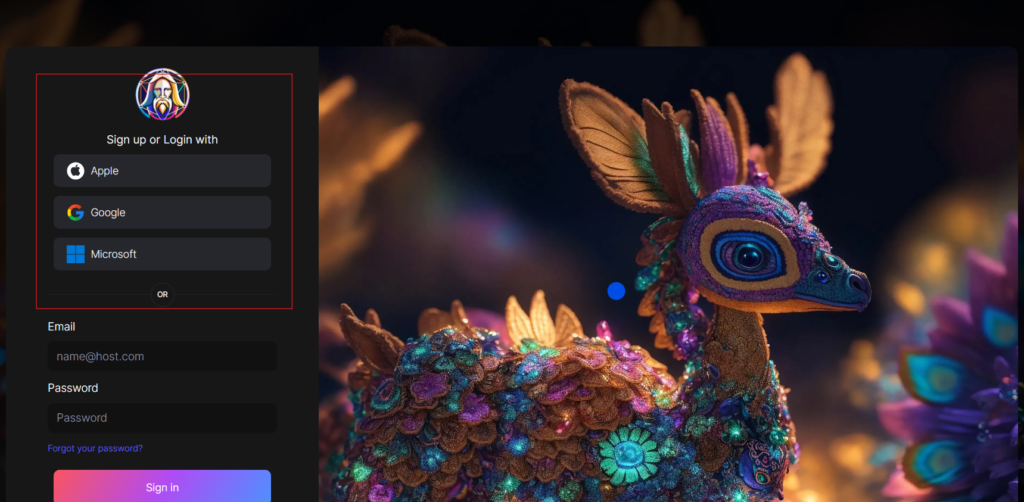
You can sign in with your Apple, Google, Microsoft account, or email account. Then, sign in with your newly created account.
Navigate to the image creation tool
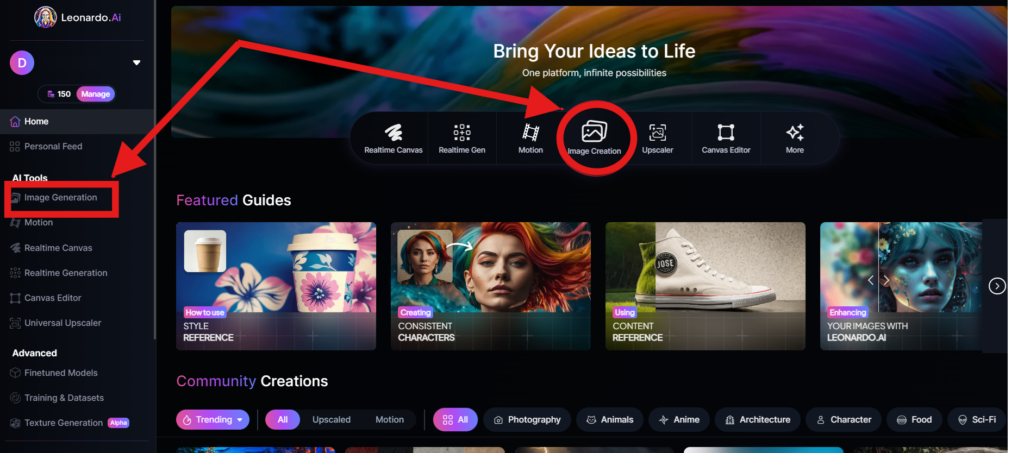
On the app.leonardo.ai homepage, select the ‘Image Generation’ option from the left panel, click on the icon in the middle or use the ‘Image Creation’ button located in the middle
Create your first image
In the prompt field at the top you can immediately create your desired Image. Or you can also create a reminder with the available AI suggestions in 2 ways:
+ Generate a random photo: 1, Click to “New Random Prompt” then 2. click Generate
+ Create a photo with an AI description by an image that you want to get the original idea. Then you edit according to your creativity
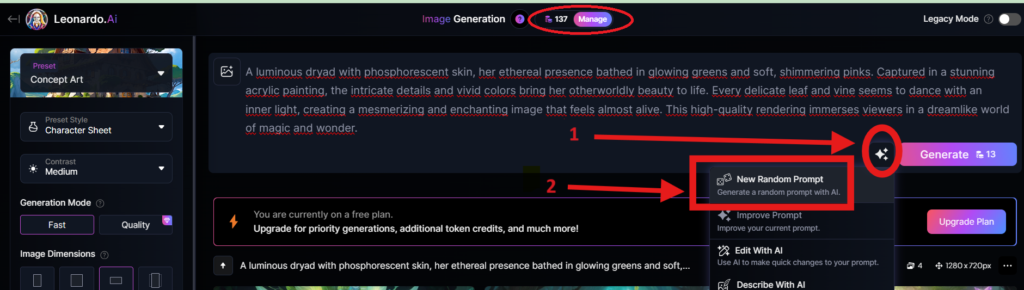
Wait about 20 seconds for Leonardo AI to generate the images, and you will receive four stunning high-resolution images as follows:
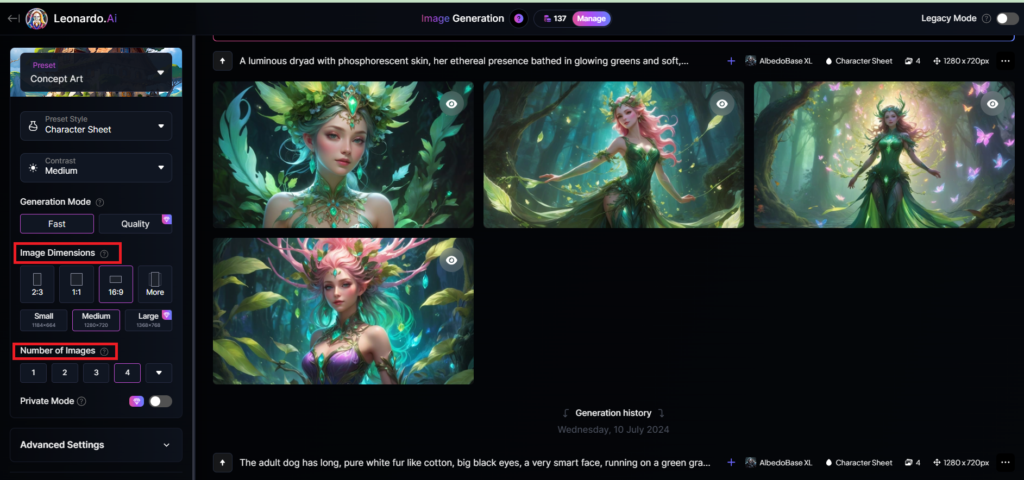
You can select the image size in the “Image Dimensions” section, which includes sizes like 2:3, 1:1, 16:9, and more options under “More” on the left. Alternatively, you can choose the number of images in the “Number of Images” section, with a maximum of 8 images that can be generated.
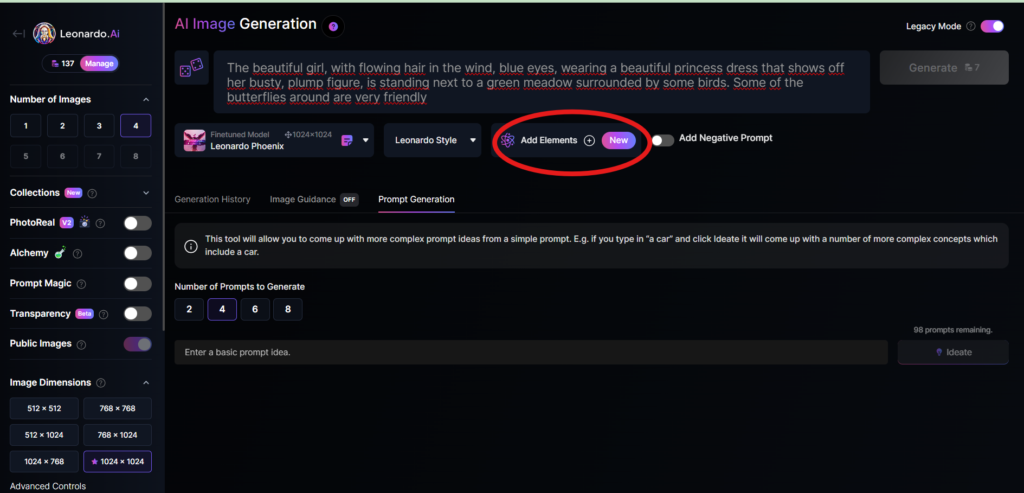
Add Elements
Use the drop-down menu under “Add Elements” to select a specific element such as Coloring Book, Folk Art Illustration, Children’s Illustration, Cartoon & Anime, or Classic Style Christmas Illustration. Although you can select multiple elements, Leonardo advises that choosing more than two elements may lead to unpredictable results.
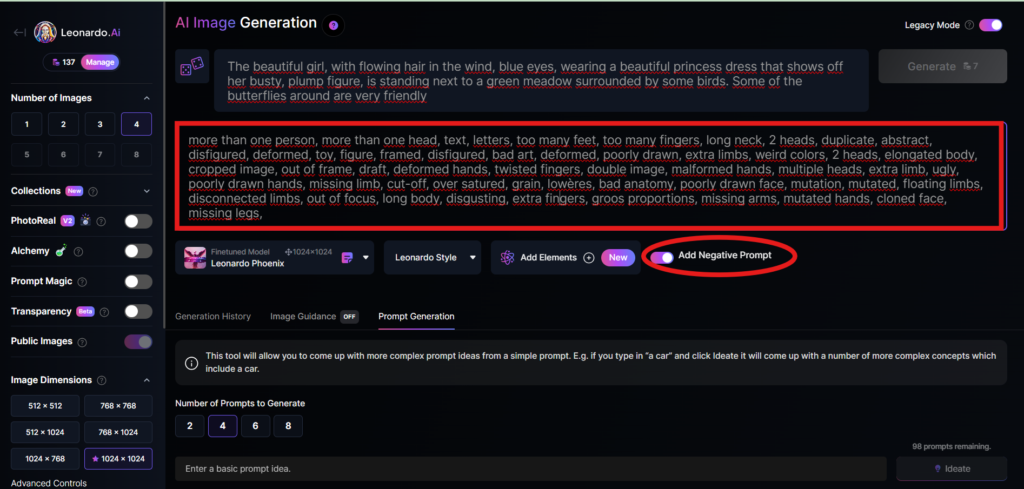
Add a negative prompt
As in the example above, I created negative prompts to ensure the resulting images were error-free, including: “more than one person, more than one head, text, letters, too many feet, too many fingers, long neck, 2 heads, duplicate, abstract, disfigured, deformed, toy, figure, framed, disfigured, bad art, deformed, poorly drawn, extra limbs, weird colors, 2 heads, elongated body, cropped image, out of frame, draft, deformed hands, twisted fingers, double image, malformed hands, multiple heads, extra limb, ugly, poorly drawn hands, missing limb, cut-off, over satured, grain, lowères, bad anatomy, poorly drawn face, mutation, mutated, floating limbs, disconnected limbs, out of focus, long body, disgusting, extra fingers, groos proportions, missing arms, mutated hands, cloned face, missing legs,”
Here are the basic steps for new users to create a simple image with Leonardo AI. In the next article, I will guide you through advanced details to create various types of images for different purposes. You can start your free trial with Leonardo AI here:

Steam Wallet Code | PE 40 PEN
PlayStation Store Wallet | JP JPY 5000 PlayStation Store Wallet gift card
You really make it seem so easy with your presentation but I find this matter to be
really something which I think I would never understand.
It seems too complex and extremely broad for me. I am looking forward for your next post,
I will try to get the hang of it!
Outlook Авторег API. OAuth2 Trusted. Включен IMAP, отлёжка 7+ дней
Старый Telegram-чат (группа) | 5000 подписчиков | Создан в 2024 году
Very nice post. I just stumbled upon your blog and wanted to say that I
have truly enjoyed surfing around your blog posts.
After all I’ll be subscribing to your feed and I hope you write again very soon!
Gmx.com – Регистрация аккаунтов с использованием настоящих резидентных EU прокси – WEB + POP3, SMTP and IMAP.
Папки с чатами для Телеграма
https://guesswish.ru/ сайт знакомств
BESTSELLER ULTIMATE PACK: User Agent’s Windows 10/11 | Windows 7/8/8.1 | macOS | Linux
UA UDP Мобильные прокси Украина | Тест 1 час | Uptime 98% | В 1 руки | 15-45 мбит/с | Vodafone/Kiyvstar/Life | Безлимит 30 дней | socks5/http
Pakistan Whatapp accounts with +92 country code
Аккаунт с полным доступом ! Epic Game – игра Blood West в комплекте
Аккаунт EpicGames с игрой DREDGE | С почтой
Gmail Autoreg. Зарегистрированы на настоящие Iphone. Отлёжка 5+ дней
Steam аккаунт 10000 часов в Paladins с родной почтой Rambler
Razer Gold Gift Card | TR TRY 1000 Razer Gold gift card
whoah this blog is fantastic i love studying your posts.
Keep up the good work! You already know, lots of persons are looking round for this info, you could help them greatly.
Hoping to bounce back from my Hollywood slump, I dived headfirst into the digital asset space, going all-in on Solana (SOL).
But trying to buy SOL quickly without getting gouged by ridiculous exchange fees or navigating
endless verification hurdles was an absolute nightmare.
That was when a trusted peer put me onto Paybis, and it saved my
financial future.
Signing up gave me the seamless fiat-to-crypto gateway I desperately needed.
The platform’s robust advantages made stacking assets effortless:
Instant transaction execution with fast debit card fiat settlements.
Rock-solid security protocols and crystal-clear pricing that protected my hard-earned cash.
Hassle-free registration that let me fund my decentralized wallet instantly.
By leveraging Paybis to stack my Solana holdings efficiently, I capitalized
on the subsequent bull run. My staked SOL assets began generating
lucrative passive income through DeFi yields, and my digital wallet is finally thriving.
From rock bottom to total financial freedom with Solana and Paybis, it
was the smartest move I ever made.
Instagram Ручная регистрация аккаунтов на MIX IP Подтверждены по EMAIL Пол: MIX Профиль чистый 2FA ON