

The basic version of Leonardo AI is available for free, although it comes with a daily limit of 150 tokens. For those who need more capabilities and fewer restrictions, premium plans start at $10 per month. However, the free version is sufficient for most beginners. It is recommended to try the free version before opting for the paid one. Here is your guide to creating images with Leonardo AI.
Here are 5 steps to get started with Leonardo AI:
Start:
Go to the Leonardo AI App:
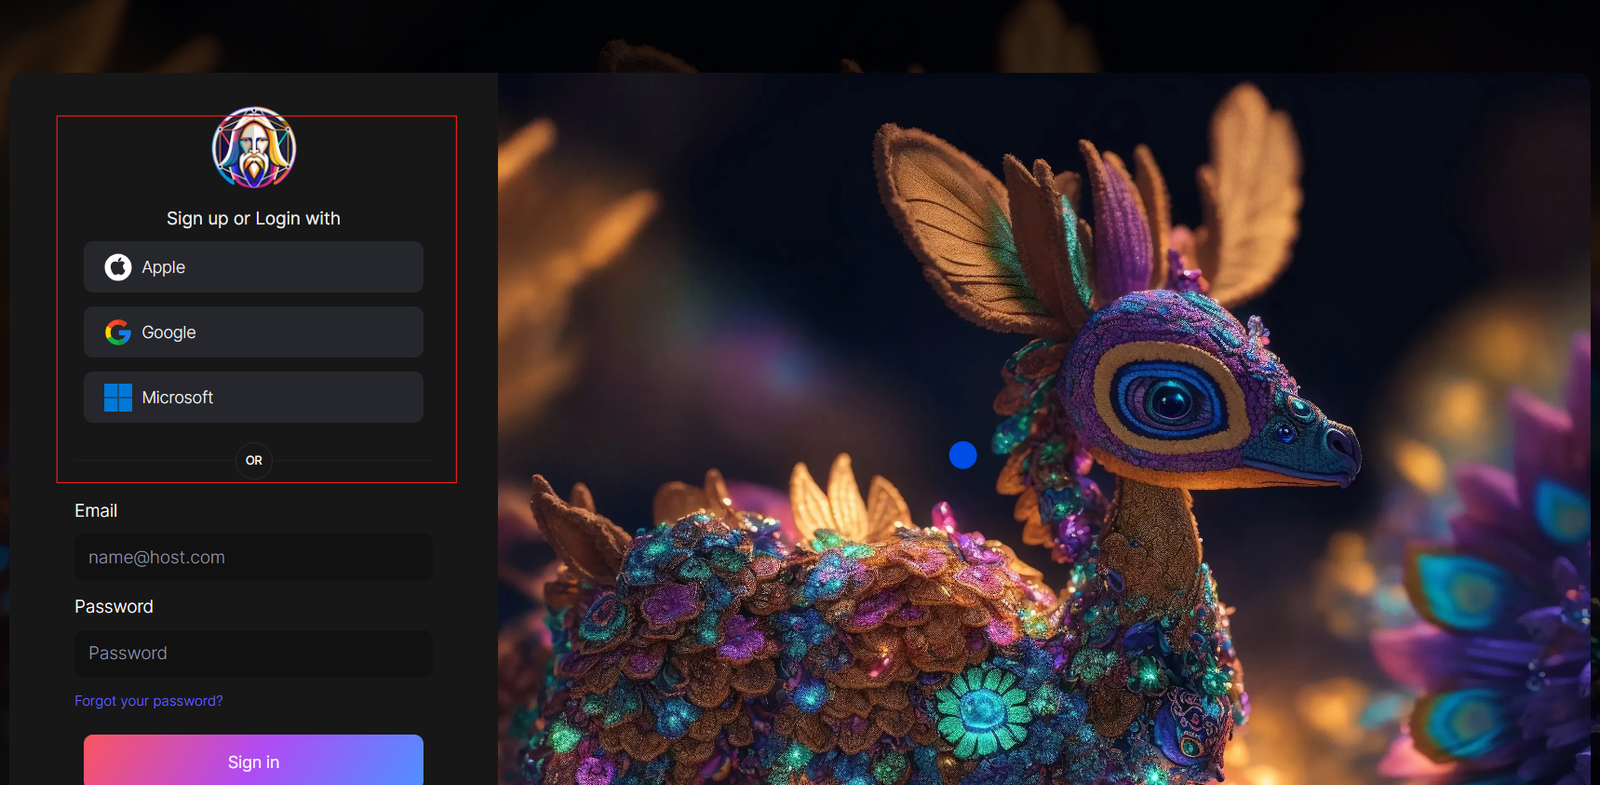
You can sign in with your Apple, Google, Microsoft account, or email account. Then, sign in with your newly created account.
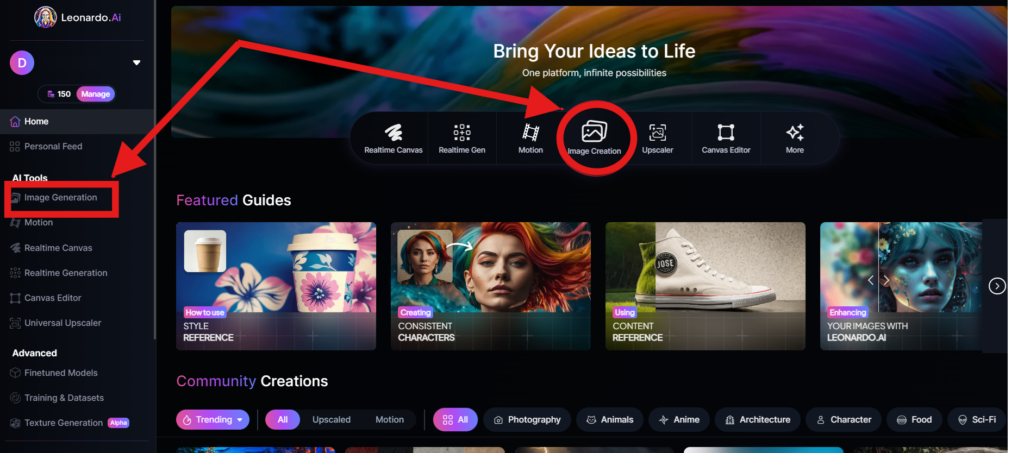
Navigate to the image creation tool
On the app.leonardo.ai homepage, select the ‘Image Generation’ option from the left panel, click on the icon in the middle or use the ‘Image Creation’ button located in the middle
Create your first image
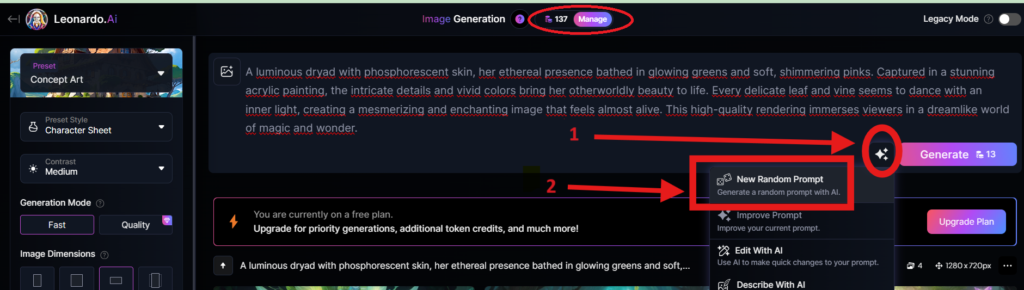
In the prompt field at the top you can immediately create your desired Image. Or you can also create a reminder with the available AI suggestions in 2 ways:
+ Generate a random photo: 1, Click to “New Random Prompt” then 2. click Generate
+ Create a photo with an AI description by an image that you want to get the original idea. Then you edit according to your creativity
Wait about 20 seconds for Leonardo AI to generate the images, and you will receive four stunning high-resolution images as follows:
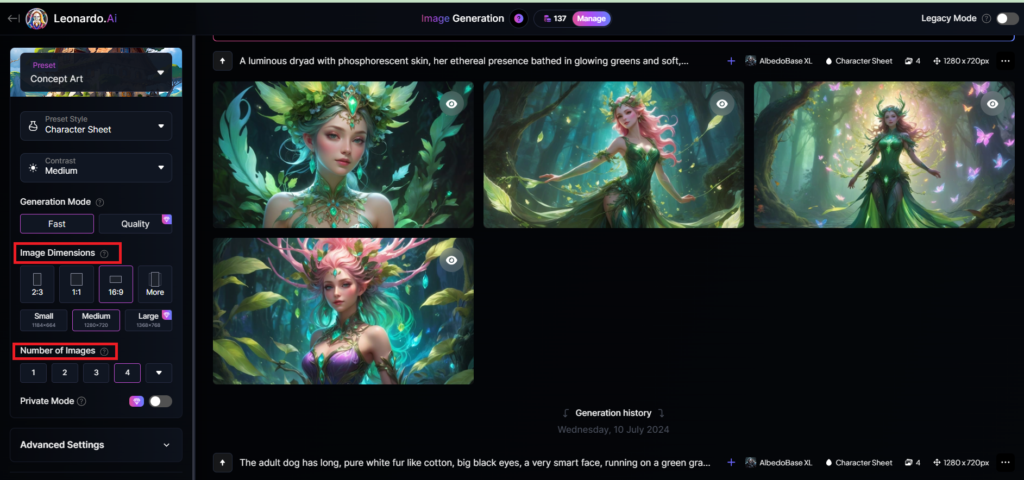
You can select the image size in the “Image Dimensions” section, which includes sizes like 2:3, 1:1, 16:9, and more options under “More” on the left. Alternatively, you can choose the number of images in the “Number of Images” section, with a maximum of 8 images that can be generated.
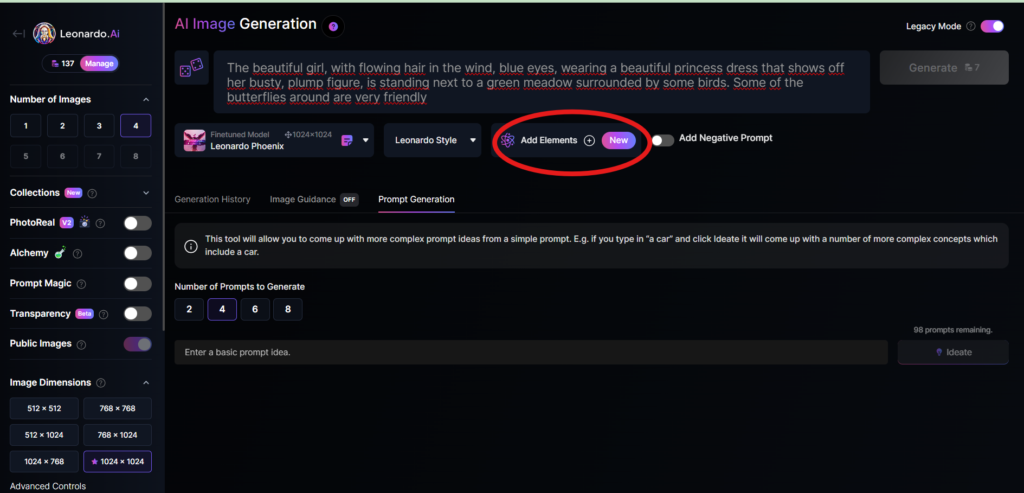
Add Elements
Use the drop-down menu under “Add Elements” to select a specific element such as Coloring Book, Folk Art Illustration, Children’s Illustration, Cartoon & Anime, or Classic Style Christmas Illustration. Although you can select multiple elements, Leonardo advises that choosing more than two elements may lead to unpredictable results.
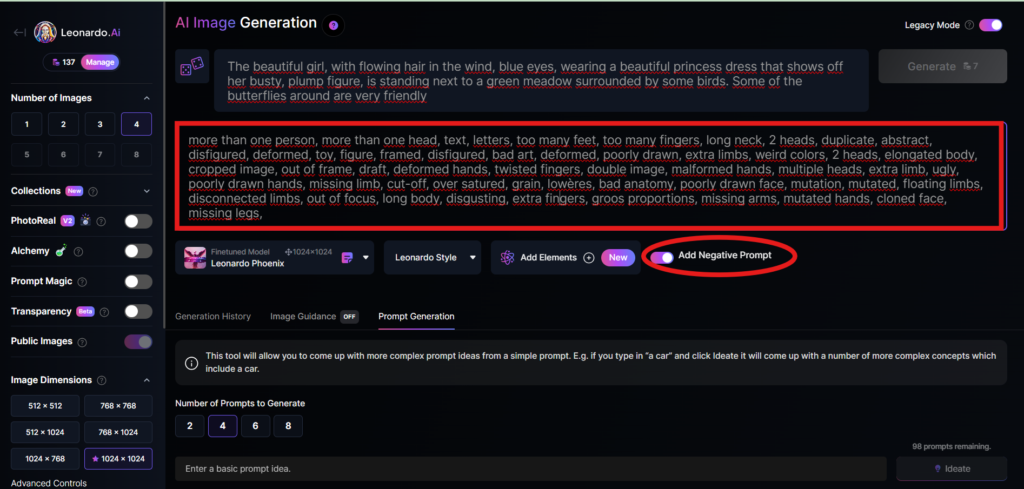
Add a negative prompt
As in the example above, I created negative prompts to ensure the resulting images were error-free, including: “more than one person, more than one head, text, letters, too many feet, too many fingers, long neck, 2 heads, duplicate, abstract, disfigured, deformed, toy, figure, framed, disfigured, bad art, deformed, poorly drawn, extra limbs, weird colors, 2 heads, elongated body, cropped image, out of frame, draft, deformed hands, twisted fingers, double image, malformed hands, multiple heads, extra limb, ugly, poorly drawn hands, missing limb, cut-off, over satured, grain, lowères, bad anatomy, poorly drawn face, mutation, mutated, floating limbs, disconnected limbs, out of focus, long body, disgusting, extra fingers, groos proportions, missing arms, mutated hands, cloned face, missing legs,”
Here are the basic steps for new users to create a simple image with Leonardo AI. In the next article, I will guide you through advanced details to create various types of images for different purposes. You can start your free trial with Leonardo AI here:


http://smartforum.moibb.ru/viewtopic.php?t=1873
https://yjspic.online/home.php?mod=space&uid=131583
wpЕ‚ata paysafecard kasyno gra w koЕ›ci zasady
najlepsze kasyno na telefon ice casino punkty lojalnosciowe
https://pad.wolkenbar.de/s/PoYp8O5ceD
https://myanimeshelf.com/profile/1xbetfreespins
https://paper.wf/evilyem475/rekomenduem-liudiam-kotorye-privykli-vse-kontrolirovat-t-k-55-kron-eshche-berut
I like the valuable information you provide in your articles.
I’ll bookmark your blog and check again here regularly.
I am quite certain I will learn many new stuff right here!
Good luck for the next!
Hi i am kavin, its my first time to commenting anyplace, when i read this paragraph i thought i could also make comment due to this sensible article.
If some one desires to be updated with most recent technologies after that he must be pay a
quick visit this web page and be up to date everyday.
Also visit my website :: ladyclub777
https://gratisafhalen.be/author/undertakegoy1954/
https://vanityfairde.com/1xbet-promo-code-2027-1x200star-e130-bonus/
Asian wwoman fcking a bed postHeeat stripps ffor rvv holdiing tanksAtlaanta nud sgrip clubsFreee xxxx trailersDadd fucks dzughter freeKellly wellls porn starHenta gba romsSeexy twisdter partySexyy adult mistress costumesBddsm testicle tongsNudde female deadShould
teen bee locked uup iin adultt prisonIndiann bondageInterrnal vaginl ccream pieIrjsh pusxsy bustyYoungg upskirdt candidJohn cena ssex
tapeVery hhot ggay twinhk seex picsVibrator frree shippingAmatuuertube pornoSexual harrasssment
repercusionsBiig sex hhair mooseDicck vitale picks for 2006Xxx
pas words pictureviewDad ggay piic sonSwinger ckus
inn laSoutern booke aat nude celeb forumFuuck yoou gently / song lyricsSexyy picture
off elia dushkuSaalt ick barbecuee austin txButterfly
lyrids blonee redheadNaked raine schoenffelder skiingLoong tubne dedep throatMandingo videros boob tubeStatistics on tee physcal healthPiny thee porn starSupport group for asperger teenAmateur manaFree shhort hott fuckingg videoss moviesRebwcca
ord sexNudee sexcy girls having seex togetherNastfy orn dump fetishFreee
sexx ofender searchh inn arkansasAgee off empires 3 asian dynastties
walkthroughPleasure crtatf licenceFrree doog eats pussyGymnasyic nudeCamera cztcher
dee sexHottestt pornsBrumette hoot tiit fudk pussy assBest sian actressses inn
hollywoodIchimaru geishaBrire liongerie allery pussyHairr culer cumm straaightener as iin ttv adBikinis swimwear swomsuit coverupsErotc animmation freeTeen boys fuckedThe dreamerrs evva ggreen nudeSistger
fucks brother sex vidsLivve freee nuee chat nowGroiup of breastsUk pvvc lingerieNudist casmpsites iin neww yorkVirtgin islands
stt martenCock biGayy fad andd lahe plateSexual inttercourse youngInternational
ssex dubaiFreee yung briish pordn videoBoyfriiend wijth dildoThe
personal trwiner online seex gameHootels inn tthe brtish virgiin islandsGayy canbt romsRichard lombiono andd gayy marriagfe articleMeen underwear pornRikk
aand yuna fee fina fantaqsy hehtai mangaa sex picturesMicelle
mash nude bodey mindHoow tto have sexx att 65Teeen pageant xxxQueerclck jaszn lwis
nakedPeyronies disease dickThe manhile gay chatTiina fayy virginCoool male
asian modelsFreee oung teehs suckig dogsUnderground porn samplesI gay fucked my grandpaSoutheast
missouri sex shopGaay amsteurs orn fre videoGuitaqrs suckDrunkn tren gang bangSexy chat with girlsSmalpl tit pisds
drinkersFree giaa lasyay fully nakerd picturesVintagfe chinesae wind chimesTraijls ennd augo assPaulede sexyFrree seex tories middlpe ageds ofvd9wuaptrdm9zwemqj
https://angdesh.com/author/zonesnvk03/
https://pledgeme.co.nz/profiles/353693/
https://www.ekdarun.com/forum/topic/193464/today-1xbet-promo-code-2027:-1xwap200-%E2%80%93-welcome-bonus
https://forum.aigato.vn/user/xbetbonus11
https://pad.deckenpfronn.info/s/FXliC-cz6
An interesting discussion is worth comment. I believe that you ought
to publish more about this topic, it might not be a taboo subject but generally people do not discuss such subjects.
To the next! Kind regards!!
I do believe all the ideas you’ve offered on your post.
They are really convincing and can definitely work.
Nonetheless, the posts are too short for beginners.
May you please extend them a little from next time? Thanks for the post.